
By Richie Vios
Here is my process for drawing attention to the center of interest of a painting.
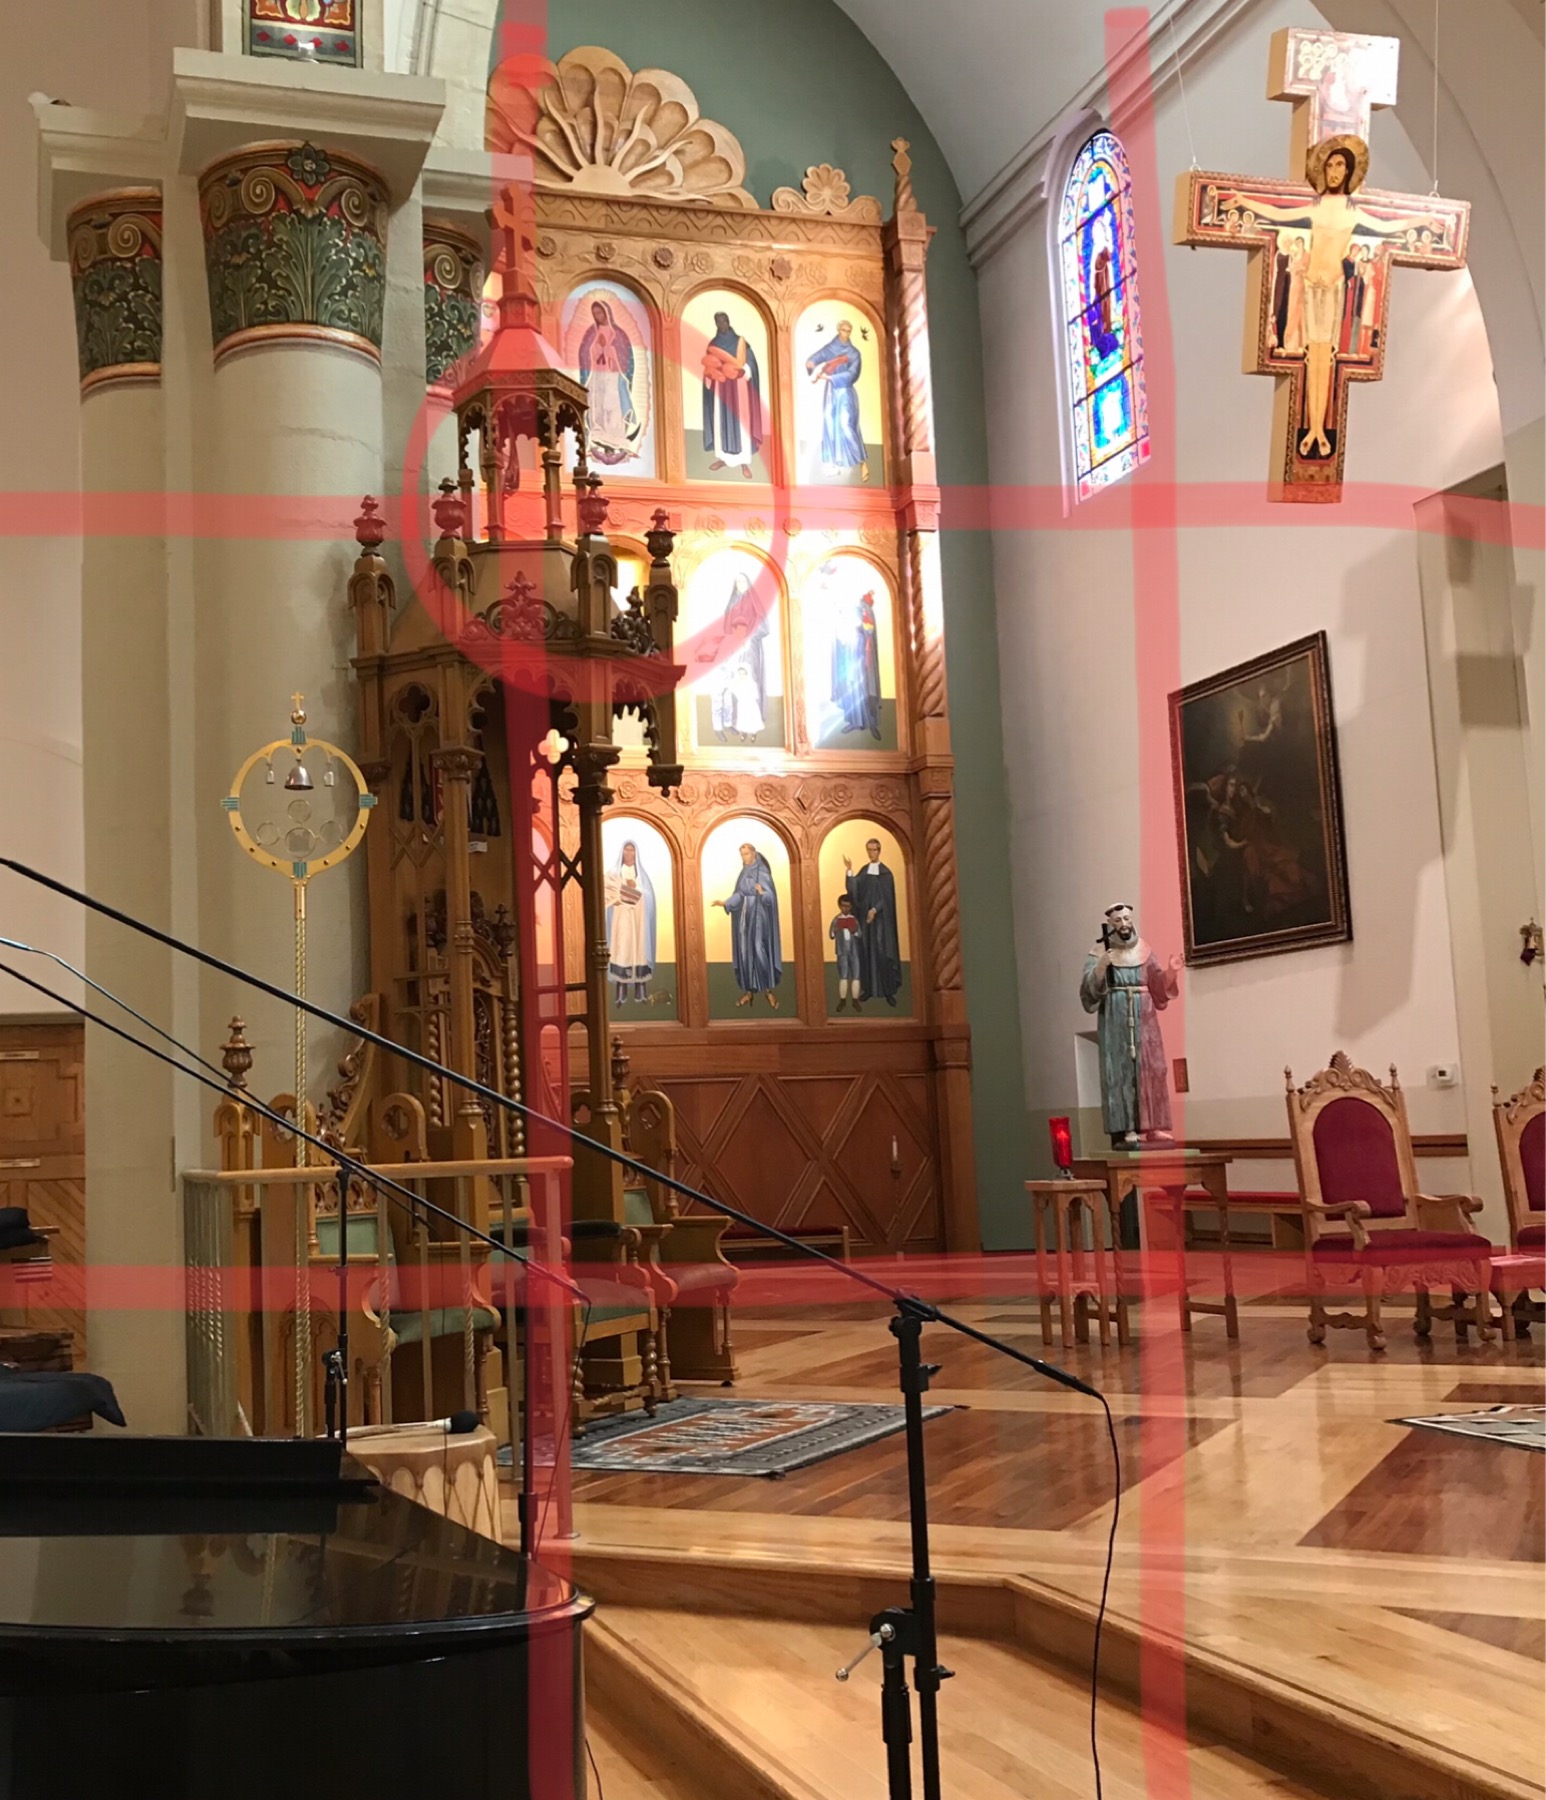 Reference Photo
I drew a rule of thirds grid over my reference photo to indicate the focal point intersection.
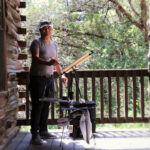
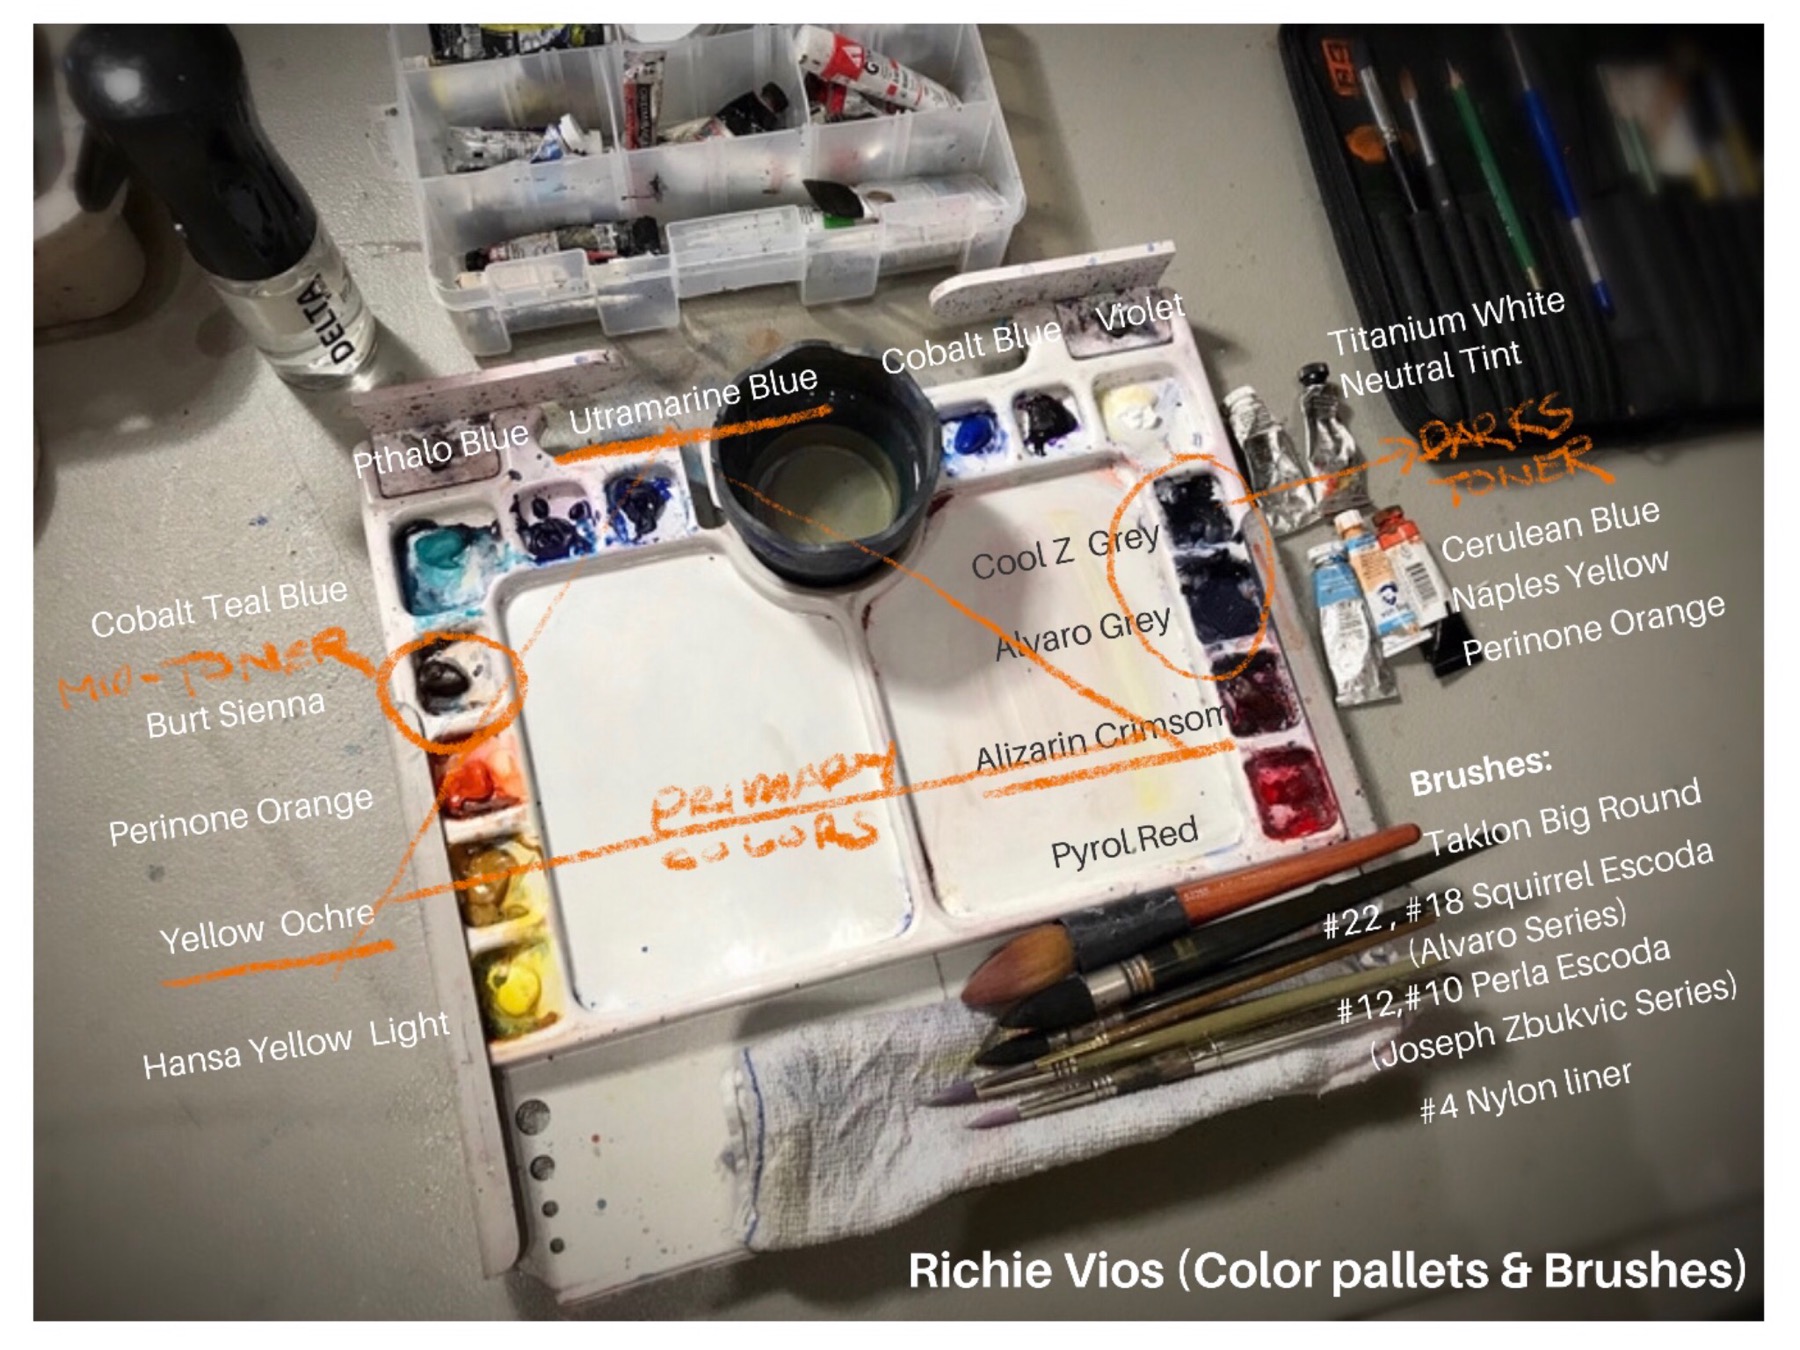 Color Palette
I use the same watercolor setup whether I’m painting in the studio or en plein air. The colors at the points of the orange triangle indicate my favorite transparent triad — yellow ochre, ultramarine blue, and alizarin crimson. I use Daniel Smith watercolors and an En Plein Air Pro palette tray attached to a Richeson Italian Steel easel.
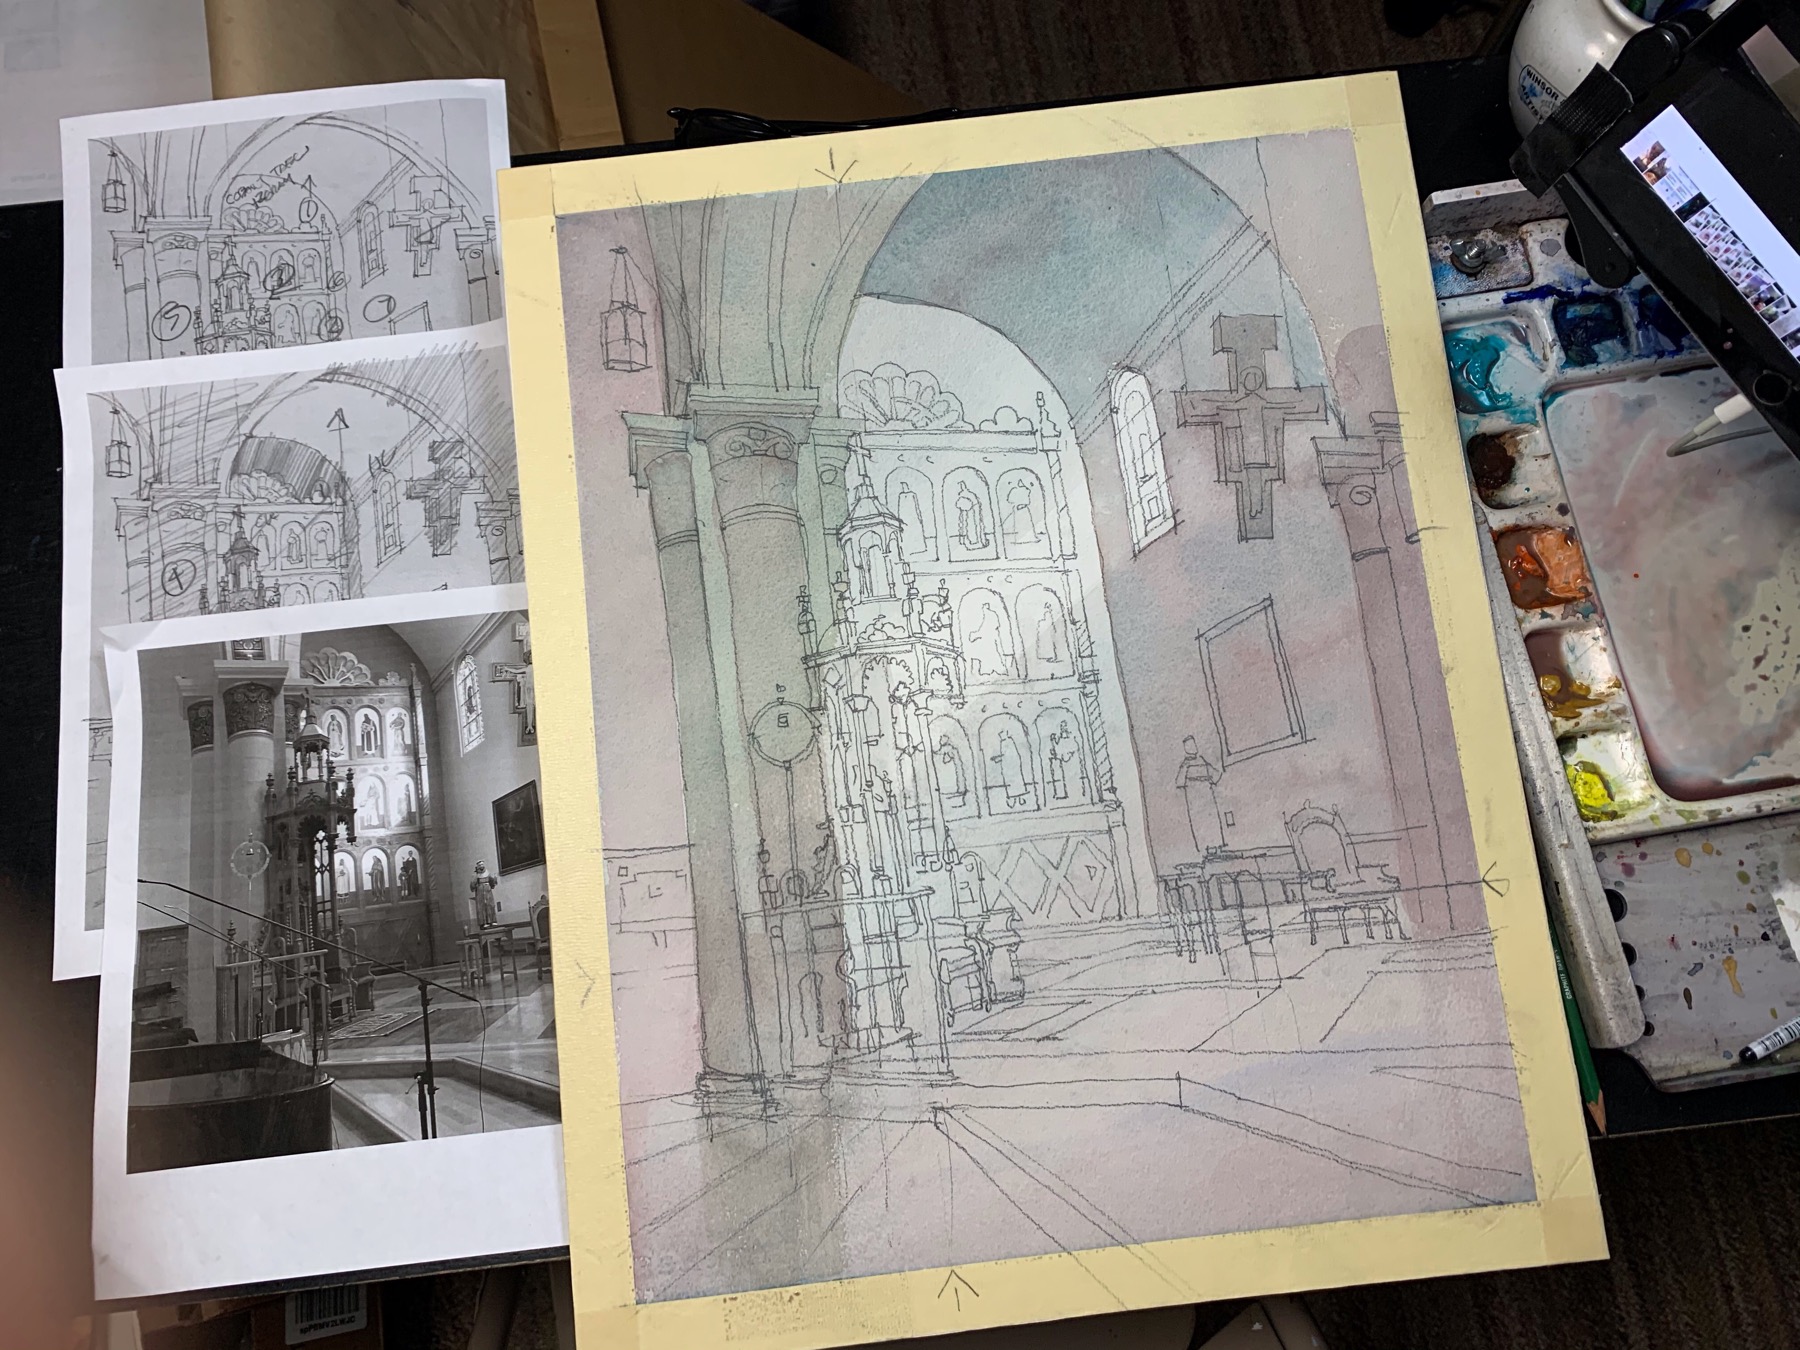 Step 1
Using Procreate software, I cut, reshaped, and added elements to the digital reference photo in order to achieve a cohesive composition. In particular, I eliminated the piano in the foreground, added a chandelier in the upper left corner to stop the eye from moving to the open space, and gradually minimized information around the focal point. Once I was happy with the design, I made a sketch of the scene, then photographed it and printed multiple black-and-white copies so that I could use a pencil to play with different value patterns directly on the prints. (If I had wanted paperless studies, I could have used my Apple digital pencil to fill in the values within the Procreate program.) I then adhered a piece of 140-lb. Arches watercolor paper to 1/4-inch thick MDF board with Liquitex gel medium and transferred two important lines from my study — the horizon line and the vertical line that aligned with the focal point. Using these plumb lines to stay on course, I began my drawing with a 4B pencil.
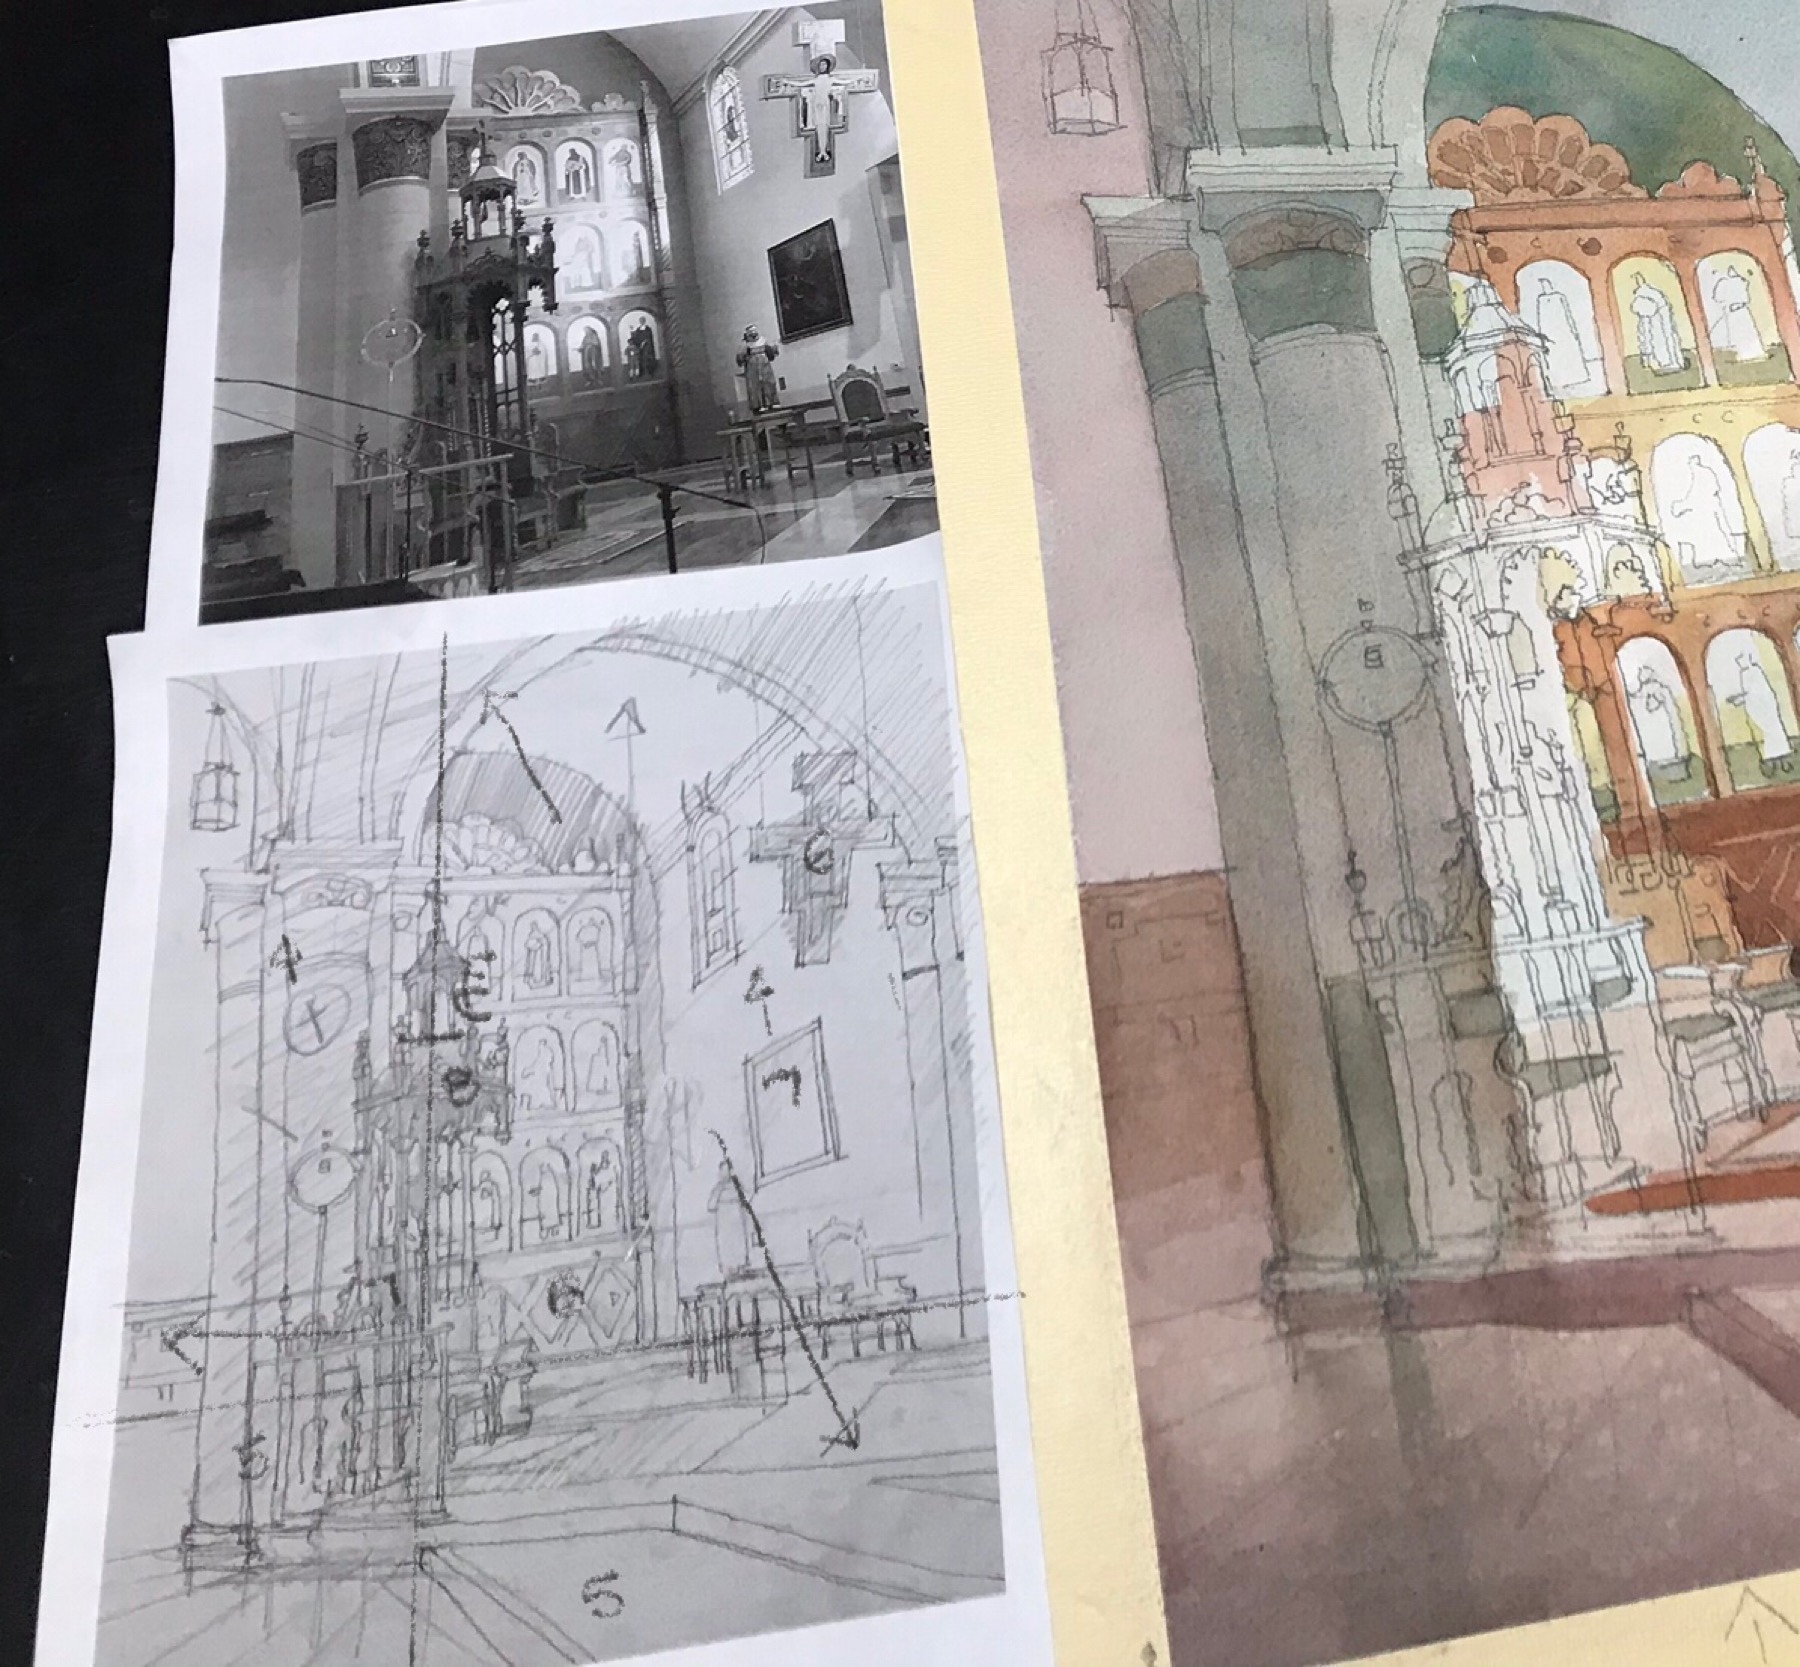 Value Study
Here you can take a closer look at one of my studies. Note how I marked the tonal values with numbers, and used arrows to indicate the direction I would slope the board for each graded wash of the underpainting.
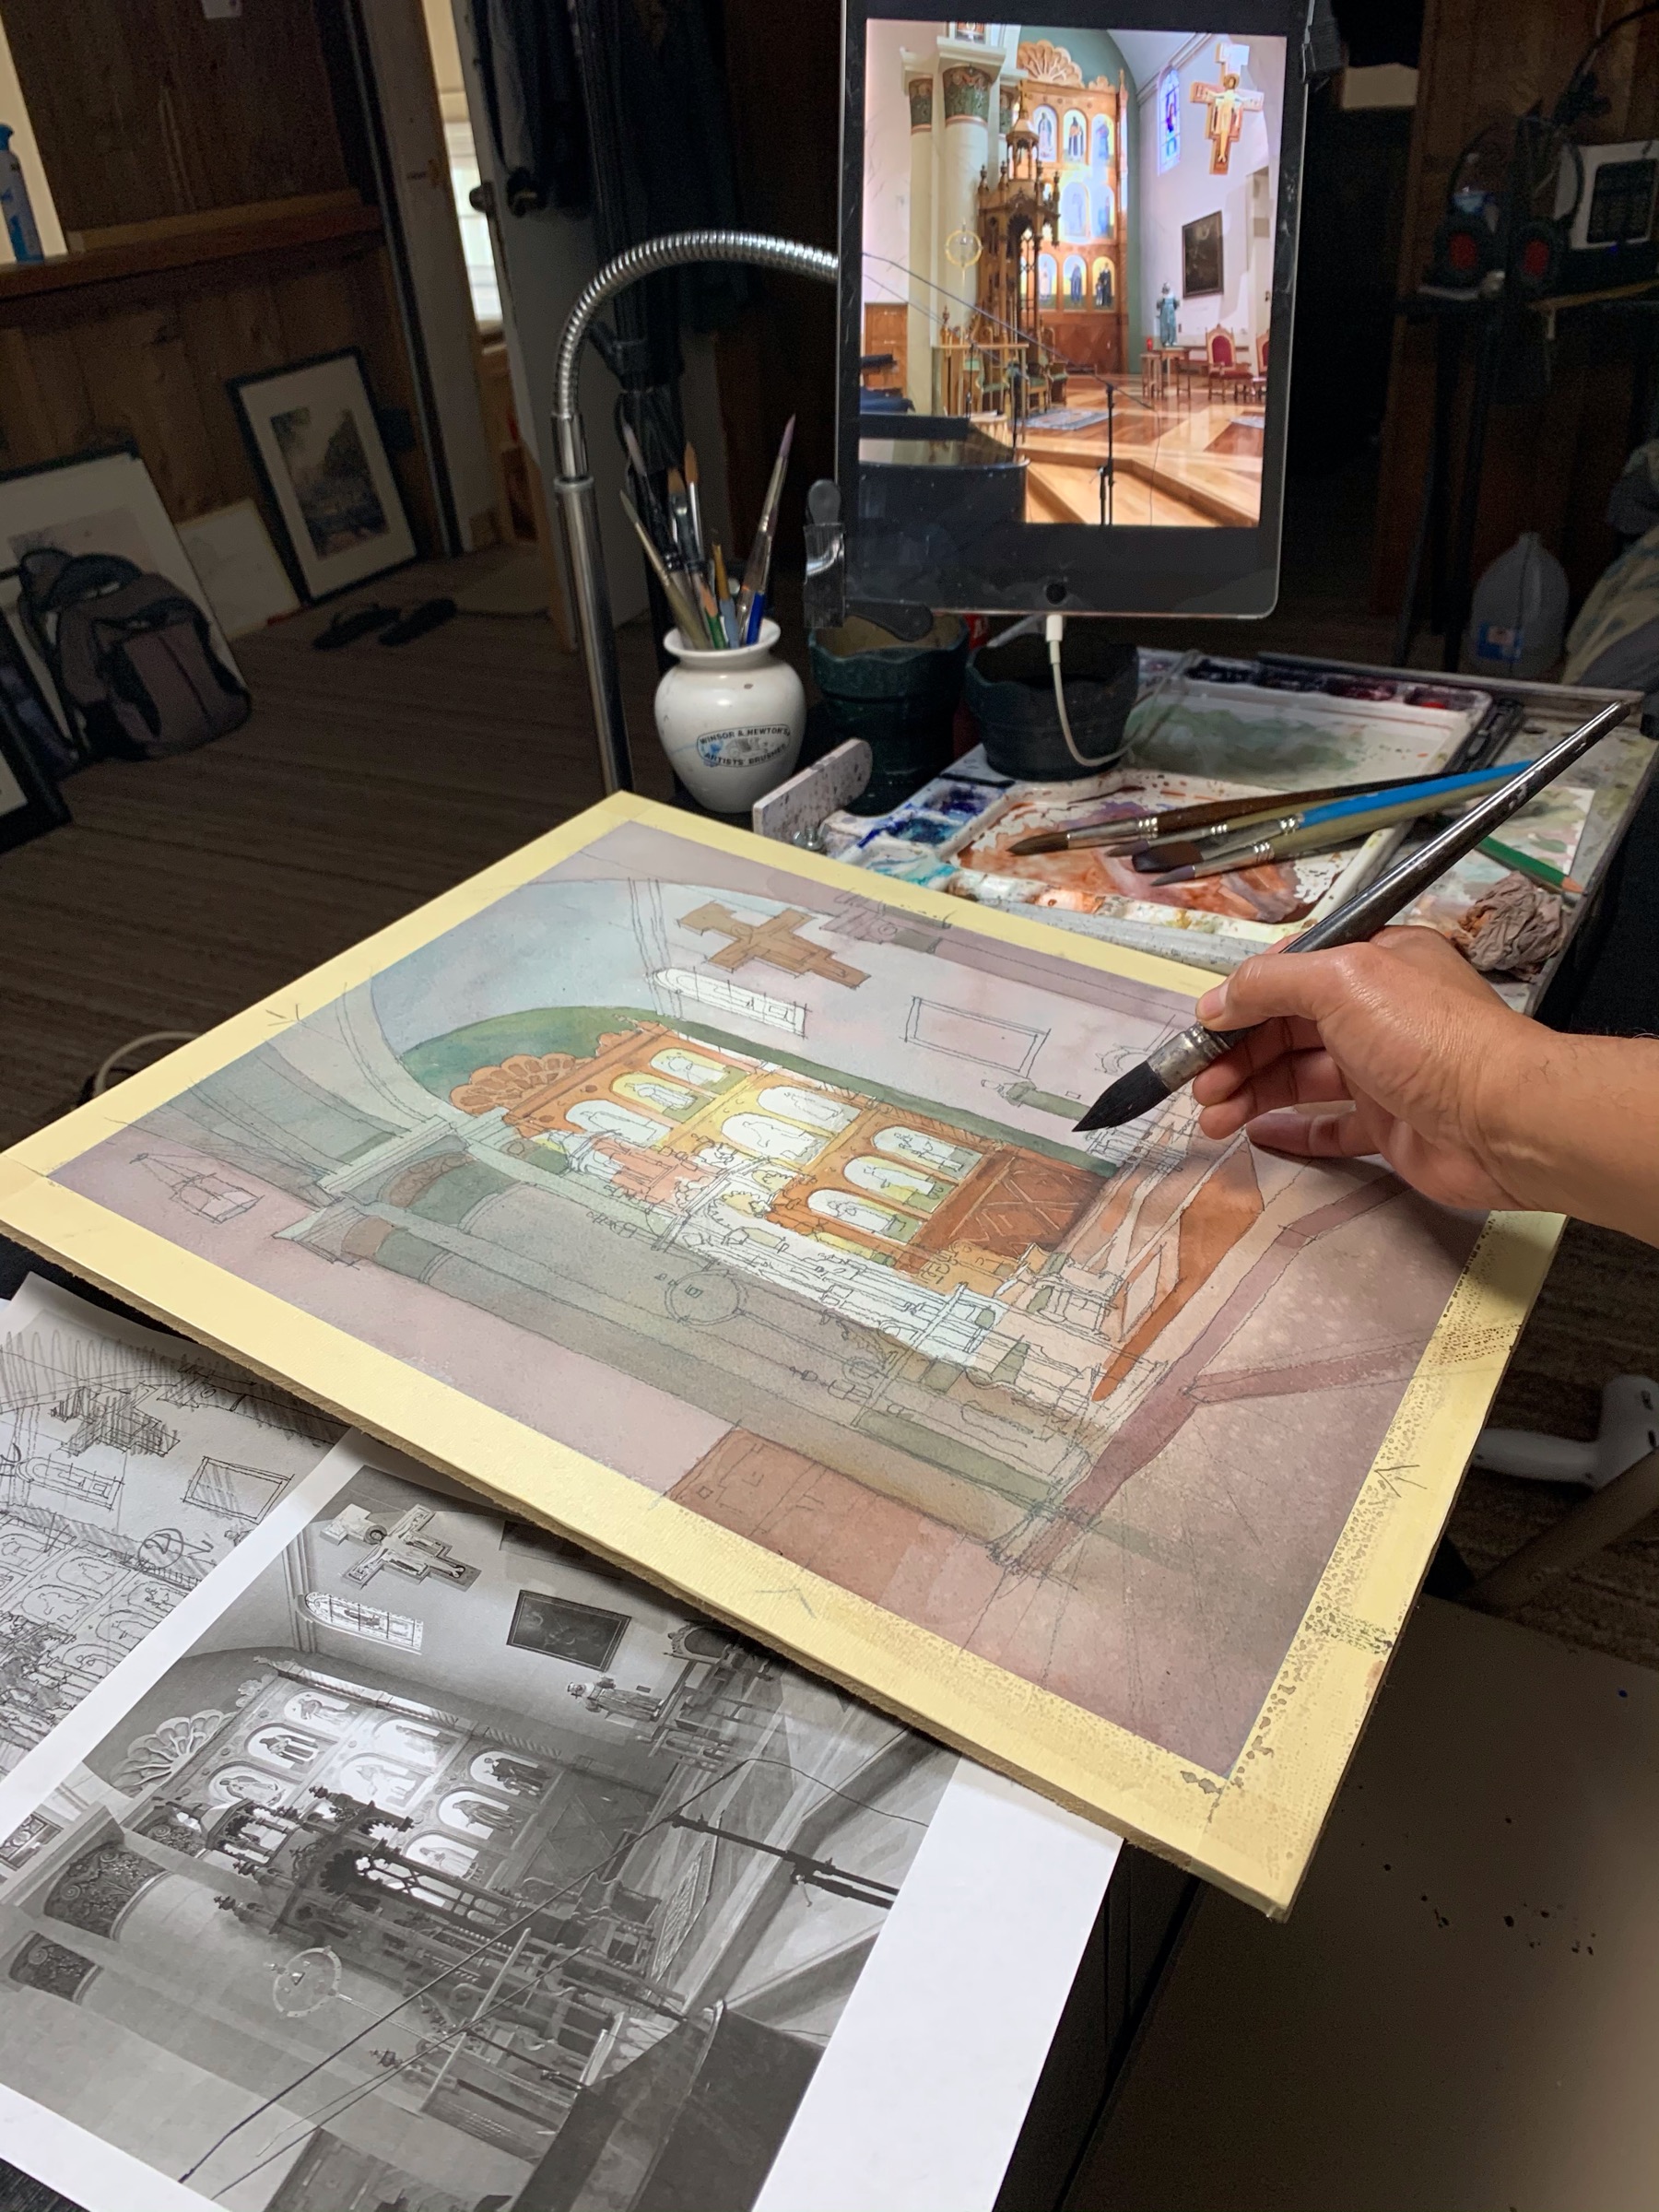 Step 2
As I established the local color of the interior, I kept important references at hand — a printed black-and-white photo of the scene, the color photo on my iPad, and my value studies. I started with the lightest values, moving to the darks, and worked from big to small, background to foreground. In this early stage, I opted for an Alvaro Castagnet Series #22 round squirrel brush by Escoda, as it holds a lot of water. By the end of the painting, I’ll switch to a nylon synthetic brush, which, by contrast, holds a lot of pigment. I applied a series of multiple glazes to capture the diagonal beams of light coming from the stained glass window. Once I started painting other elements of the scene it would have been difficult to go back and capture the light effects so I repeated the glazing process until I was satisfied with the result when it was dry. I used mixes of alizarin crimson, Zbukvic cool gray (labeled Cool Z Grey on my palette), and cobalt teal blue.
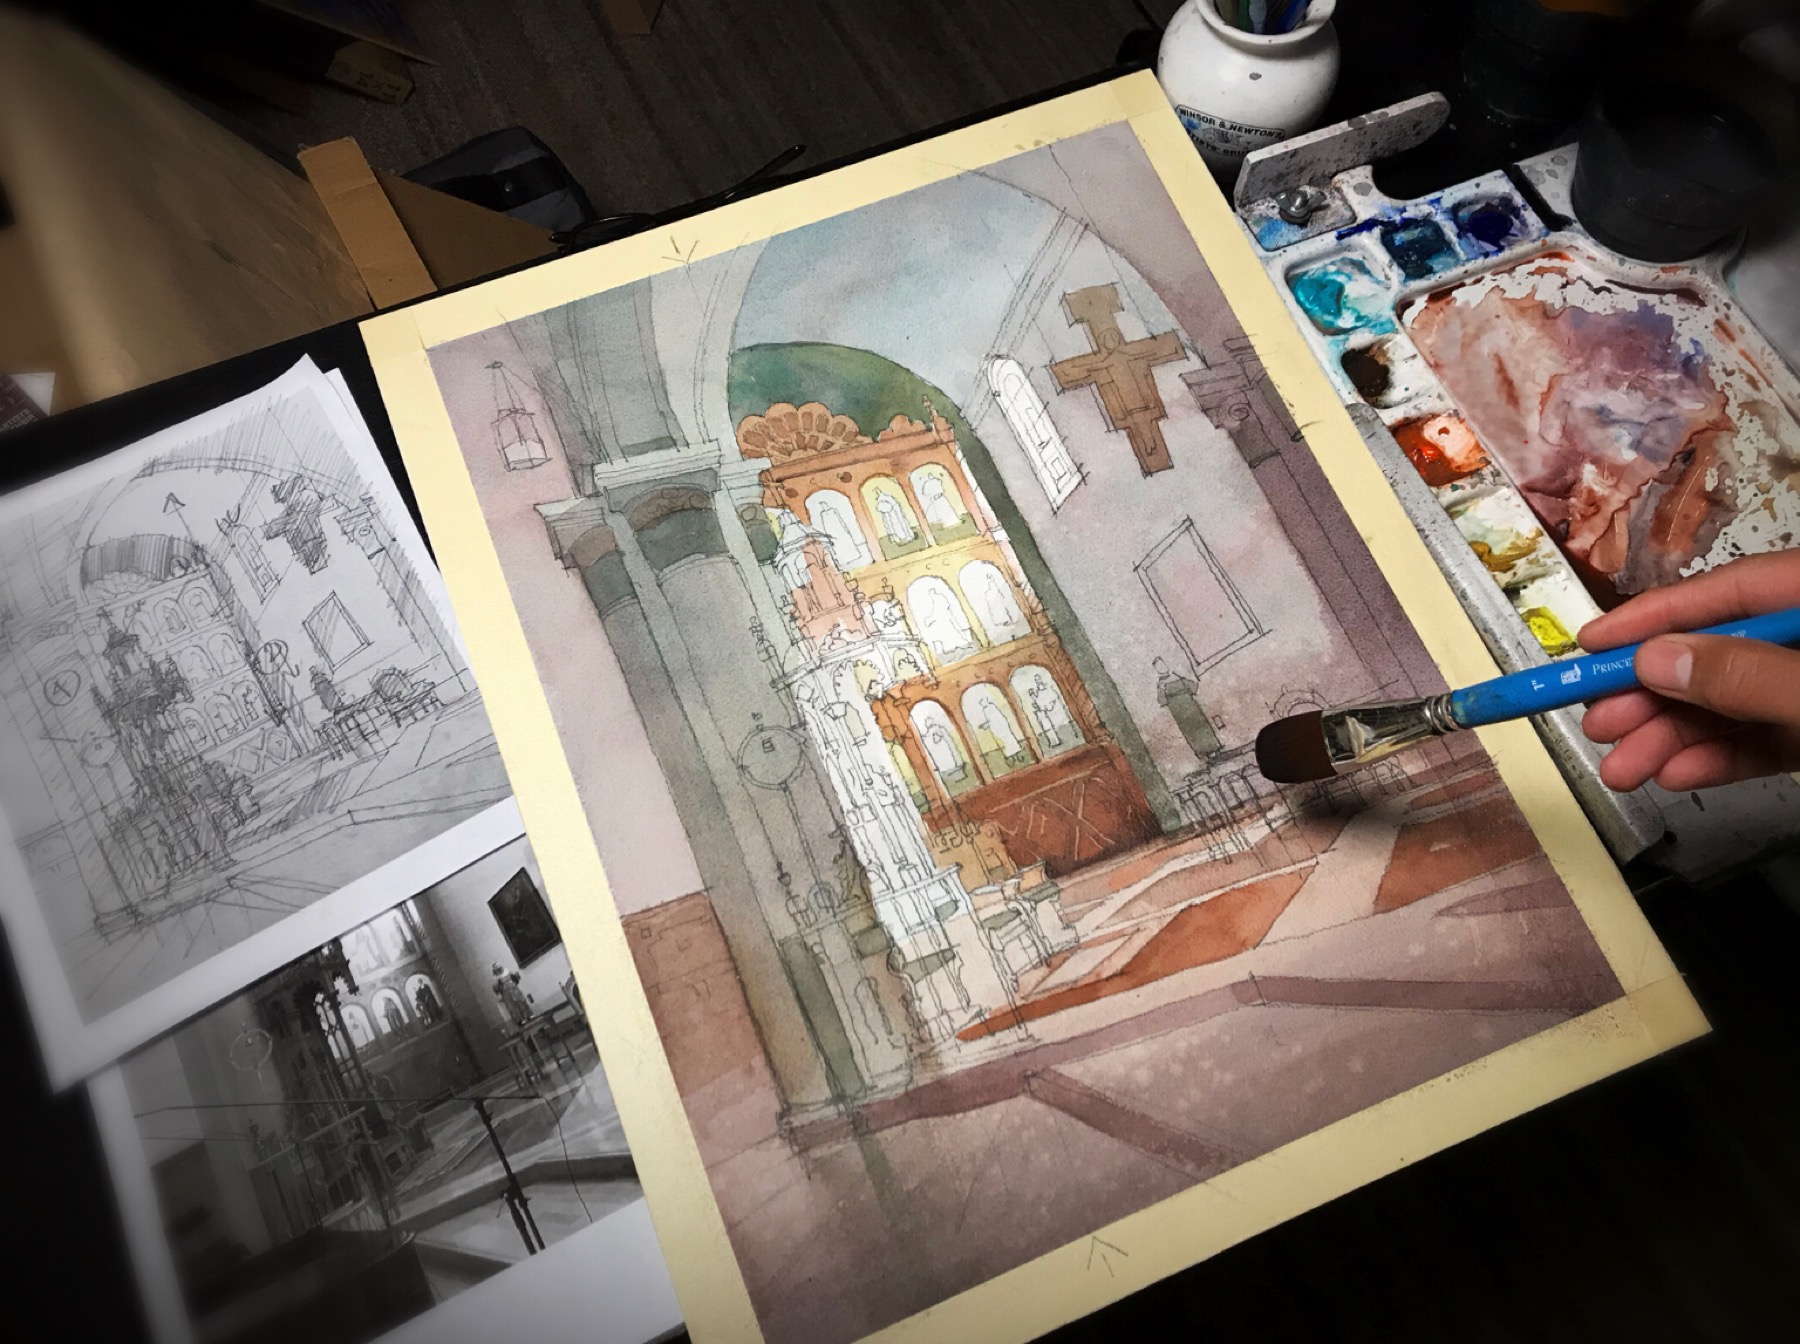 Step 3
With the local color in place, I began enhancing shapes and creating volume by darkening or lifting areas of color. I also introduced an orange hue to represent the warm color of the wood panels in the reredos (the ornamental screen covering the wall at the back of an altar). To create a sense of depth, I adjusted the edges of objects depending on their distance from the viewer, softening edges in the background and creating more definition on details in the foreground. At this stage, I switched to #18 and #12 Perla Nylon synthetic Escoda brushes from the Joseph Zbukvic signature series.
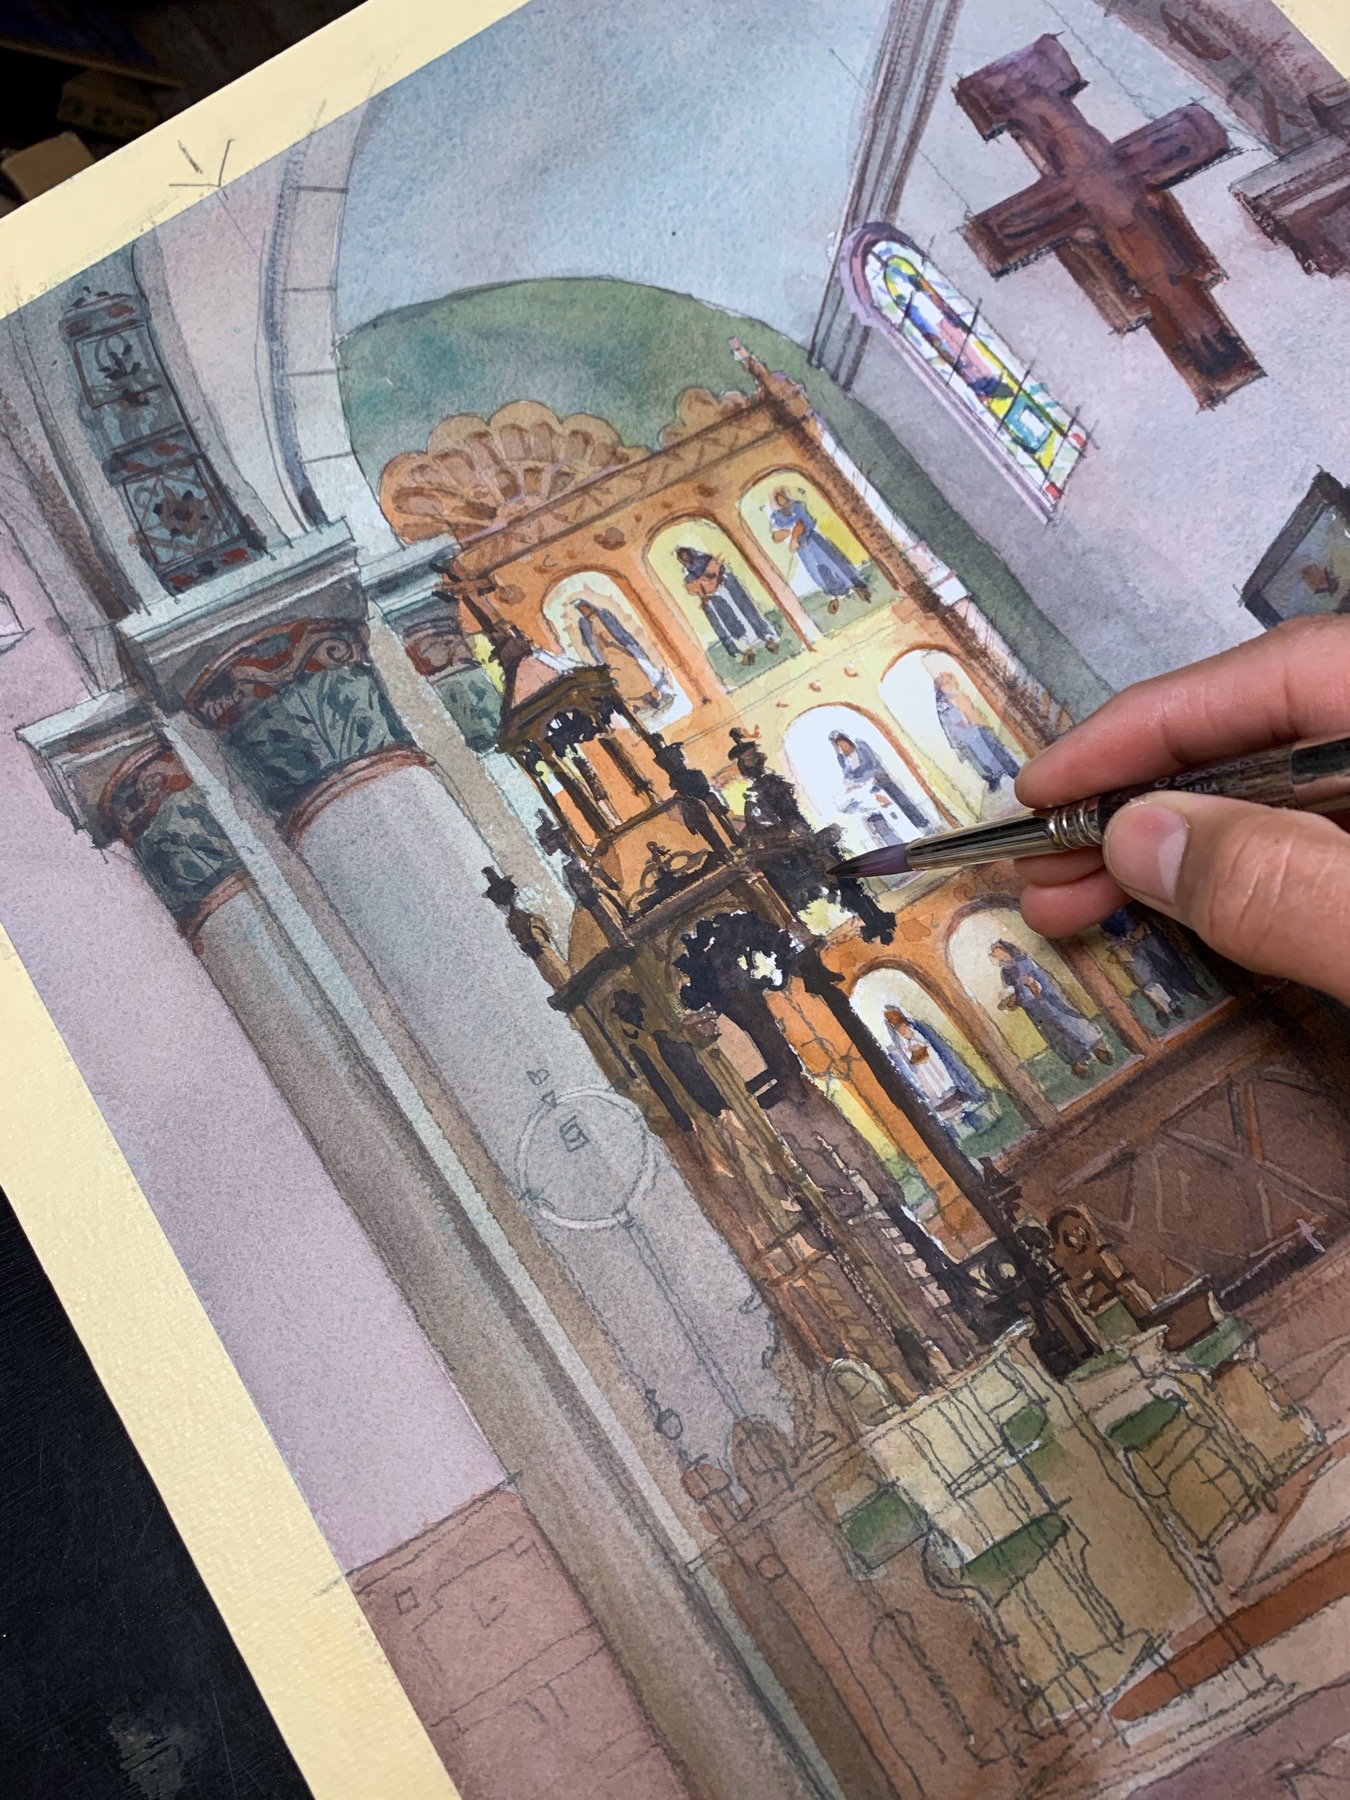 Final Step
I continued to add layers of color and fill in shapes, focusing on their relationship to the focal point. I used less defined edges, color intensity, and value contrast the farther away from the center of interest the objects were. Using a limited number of quick, confident brushstrokes, I applied a significant amount of Zbukvic cool gray to generate mid to dark tonal values, including shadows for which I added the gray to the excess mixes on my palette. Finally, I stepped back about five times the diagonal length of the painting to view the piece from a distance. I added the finishing details, and applied the darkest darks and notes of broken color (small patches of bright color outside the painting’s overall color scheme; for example, the vibrant red candle near the horizon line). I also put in the reflected lights from objects both shiny and matte — and everything in between. Finishing with the brights, reflections, and shadows tied everything together to make a cohesive painting.
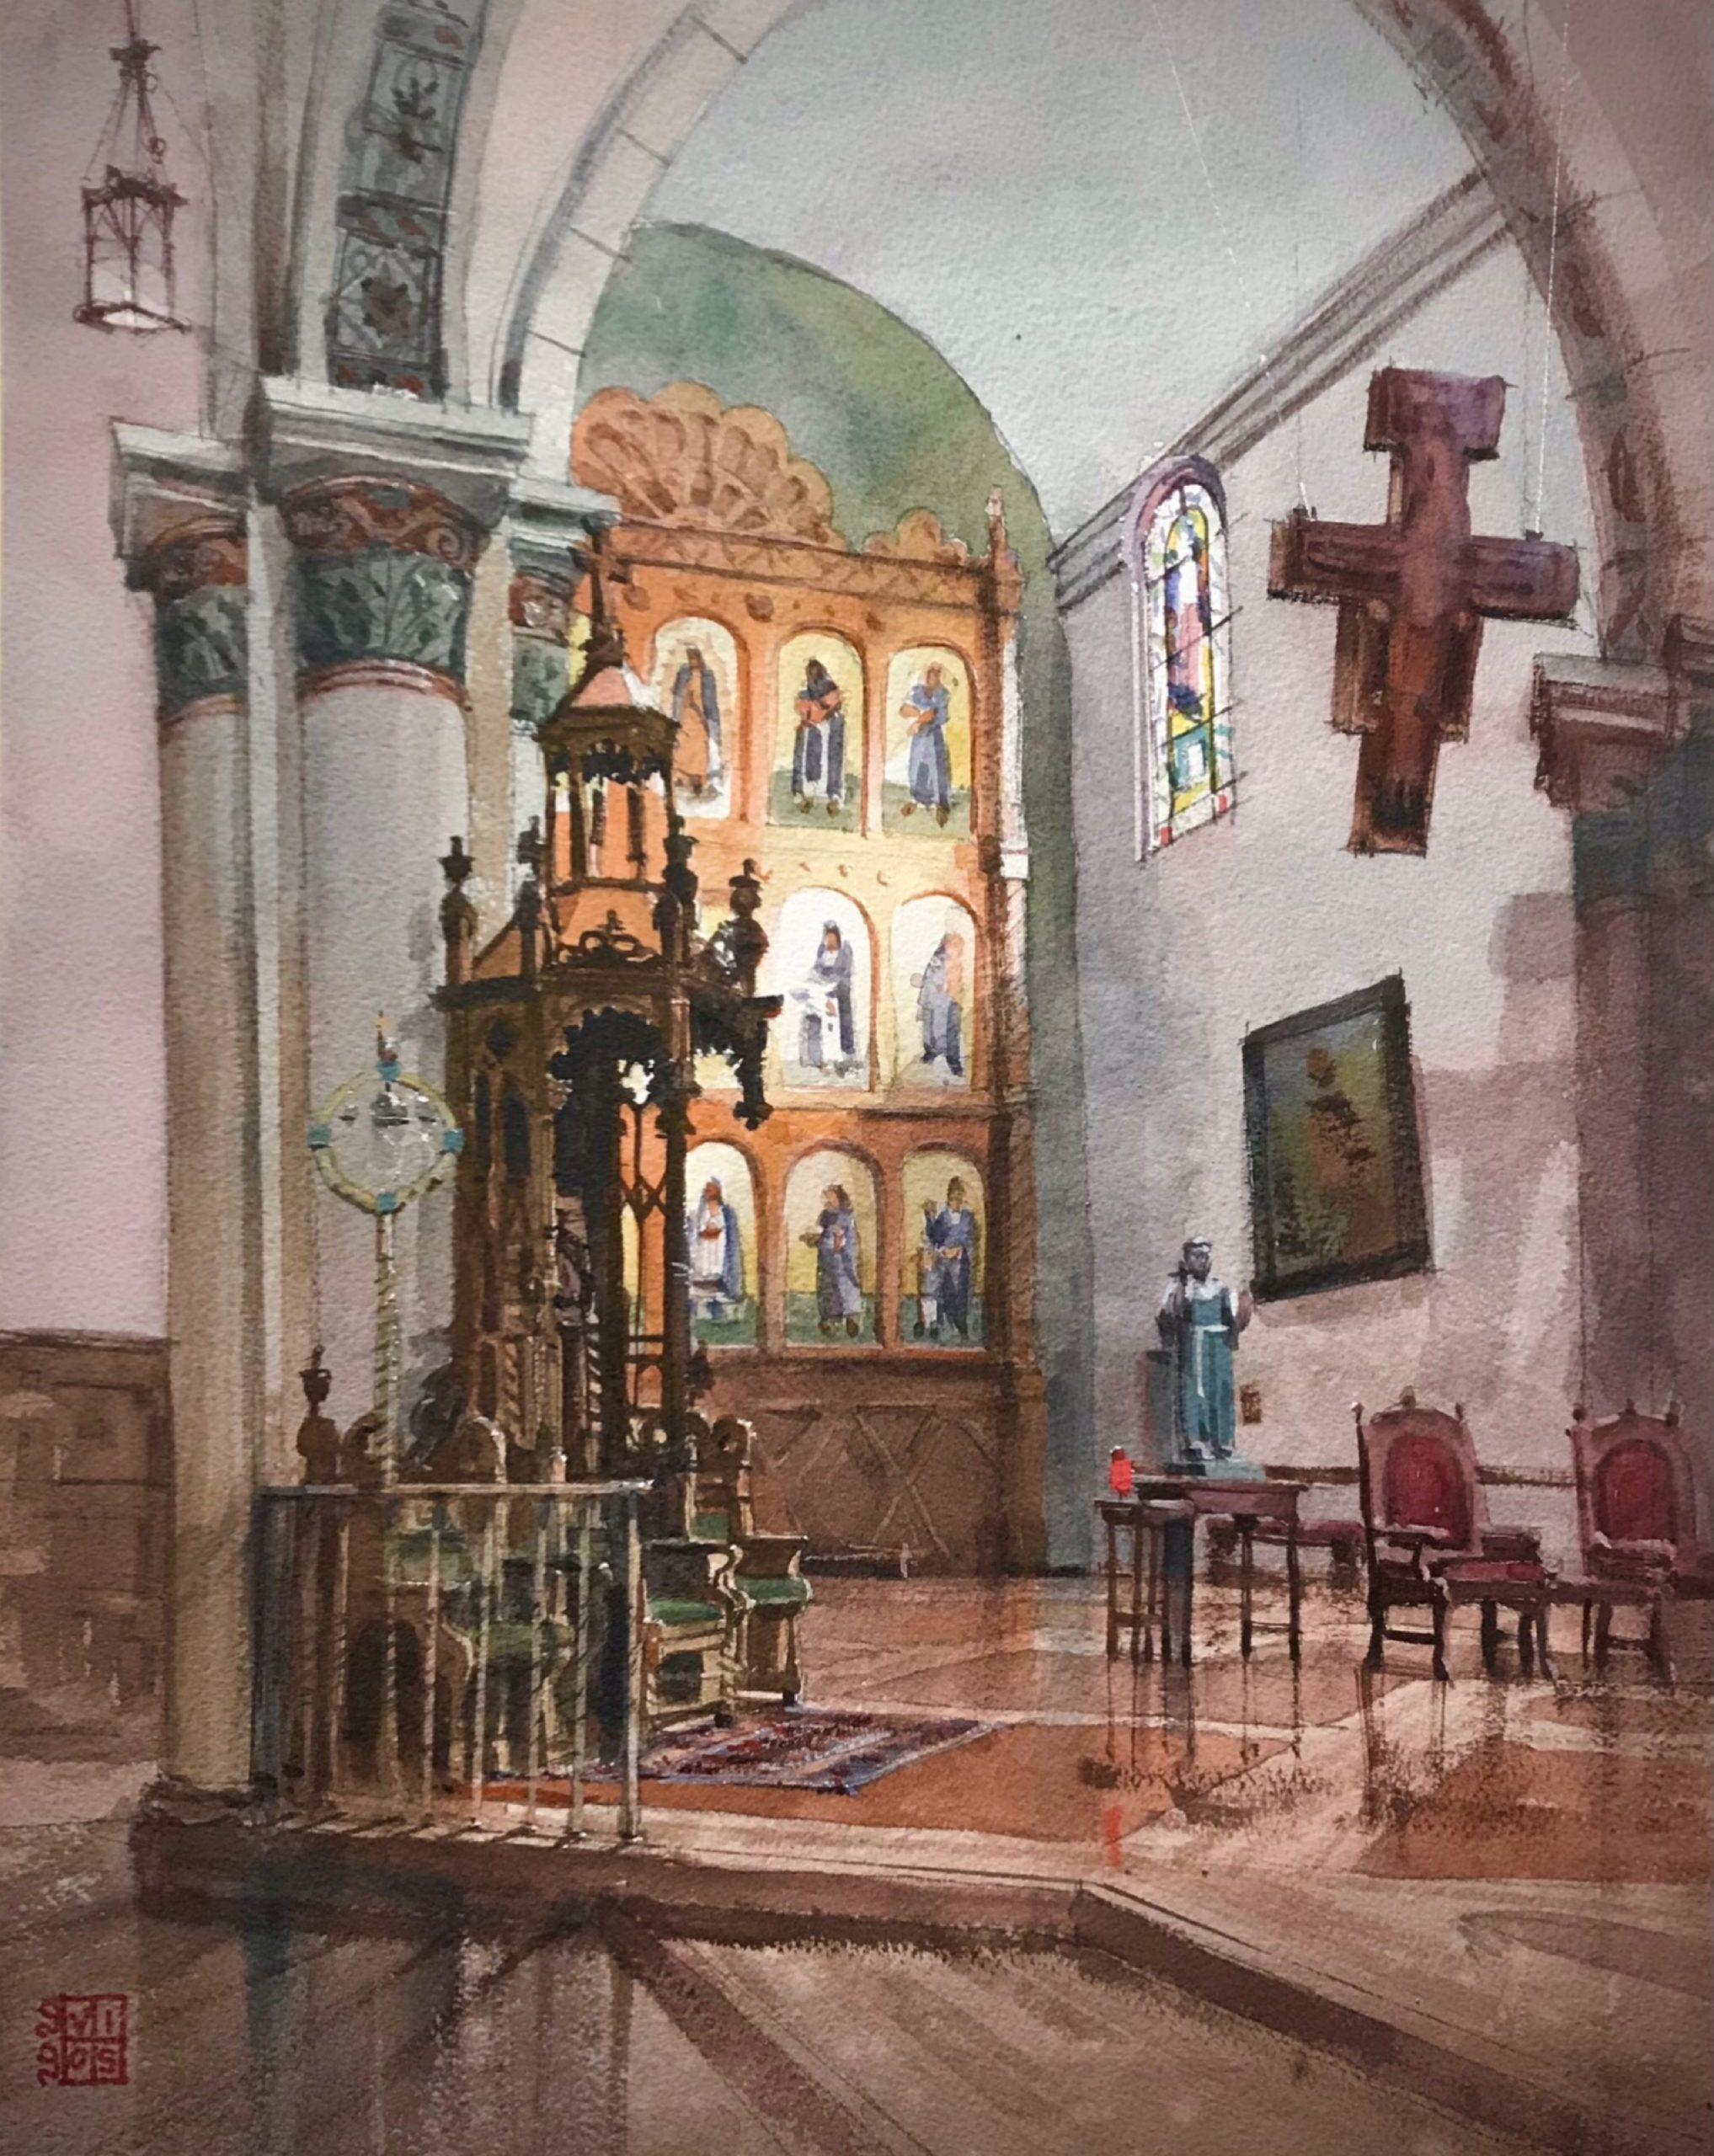
The Nave (watercolor, 20 x 16 in.)
For more inspiring stories like this one, sign up for our free weekly e-newsletter.
 RICHIE N. VIOS worked as an architect before taking up watercolor full time in 2018.


Have a show of early days of water color : the women artist.
Thank you for sharing so much detail in your planning process. Always interesting to learn the thoughts, decision factors, and work behind the final product.
I LOVE this paintings , and I like to learning more about them