
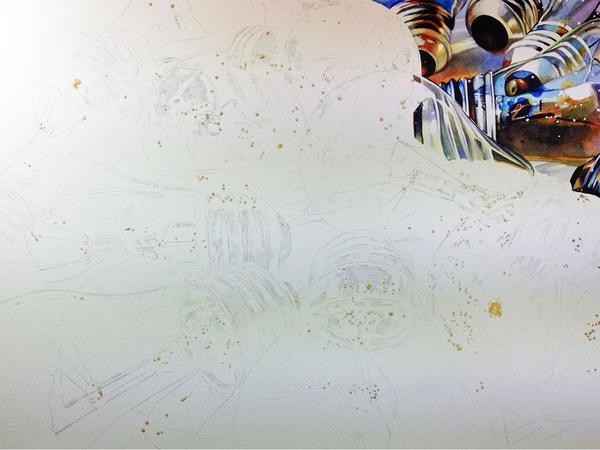
“I start my process by transferring my drawing onto 156-lb. Arches cold-pressed paper,” says Carrie Waller. “I try to minimize the amount of graphite on my paper, but I will shade in some of the shadow areas to help me navigate my drawing while I’m painting. I mask around my highlights (using Incredible White Mask and a #4 round brush), then start on the right side of the paper and paint one area at a time to completion. This process allows me to establish my values from the beginning.
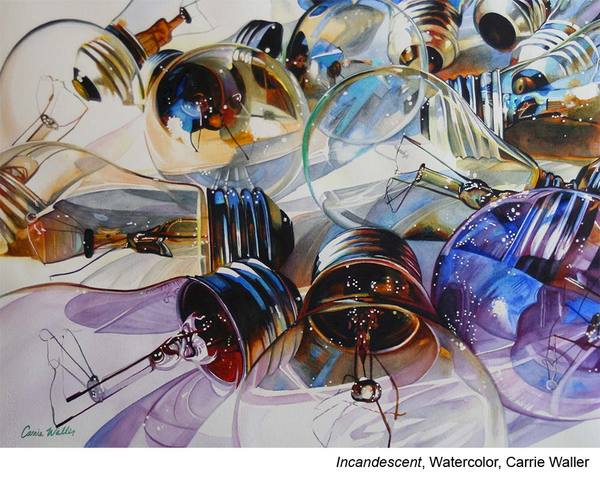
“Light bulbs are so much fun to paint because there are so many bits and pieces, and the glass distorts the bulb behind it, creating lots of fun abstractions. I use a palette of Daniel Smith paints for this painting — quinacridone gold, quinacridone burnt orange, ultramarine blue, Payne’s gray, cobalt teal blue, quinophthalone yellow, carbazole violet, pyrrol orange, undersea green, perylene red, indigo, and sepia.

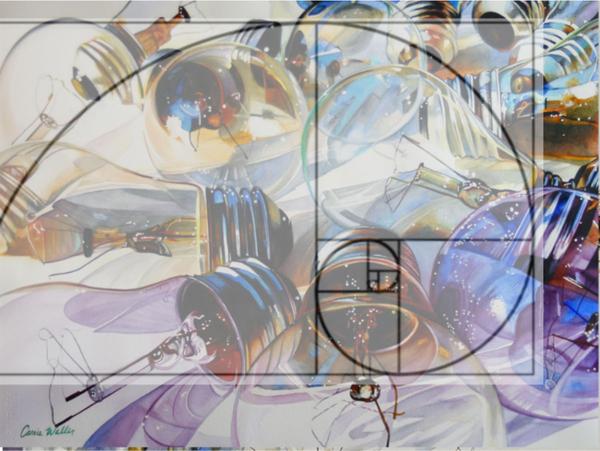
“I use GE Reveal light bulbs in this setup. When saturated, they add a beautiful purple pop to the painting. This composition uses the golden ratio — the curves of the bulbs draw you around the composition, leading you to the bulb in the front.
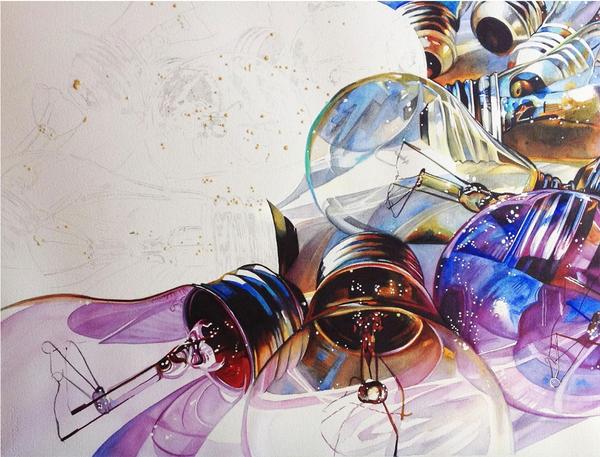
“In the next step, you can see that I am getting close to completing the painting. By using a complementary color scheme, I’m creating interest and harmony. I use a wet-on-wet technique in the larger areas so that colors mingle together. I do all of my color blending on the paper by dropping in colors that I want to mix. For details, I turn to wet-on-dry techniques.
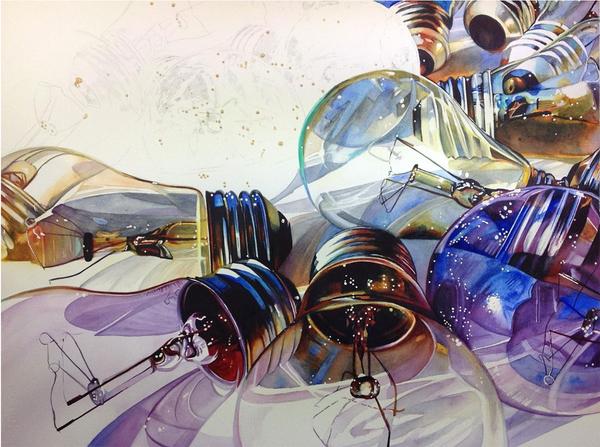
“I do include some lost edges in the finished piece; which add visual interest. This painting took two and a half weeks to complete. This was the second light bulb painting I completed in the series. I especially like the viewpoint of this composition, which allows to look into and through the bulbs, creating lots of interesting details. Some of the challenges I faced in this painting included making sure that all the shapes and colors lined up correctly. I really had to step back and take a look to make sure that the reflections and bulbs were lining up, since there was so much overlapping.”

In Watercolor Realism: Glass & Wood, Laurin McCracken walks you through every step of his painting process from start to finish. Expand your knowledge of tools and learn — from brushes to paper to paint — which will make the difference for your realistic paintings.


I can’t believe the detail, it just amazing. I would have gotten lost right away! Fantastic work
Hi Carrie, I love your watercolor techniques. By the way, my 4th grandmother back was a Waller! I am doing watercolor paintings and love it! I’m 76 years young!!!
What an inspiration. I am amazed at the detail. Job well done.