

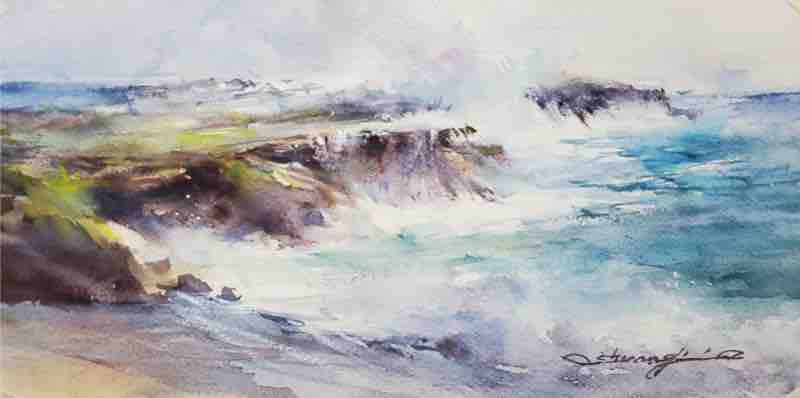
“Rapidly moving water — from crashing waves to a running creek or gushing waterfall — is one of my favorite subjects to paint en plein air,” says Shuang Li. “Since it mostly appears white (or very light in value and color), painting the illusion of water in motion can be as simple for the watercolor artist as preserving the white of the paper.
“Before I start, I clearly define the size and location of the white shape in my composition. If possible, I also indicate the placement of darks such as cliffs, rocks, or riverbanks that will enhance the illusion of water and the direction it’s moving.
“Working en plein air, I keep the larger whites dry most of time, and use negative painting techniques to paint everything around the water shape so it “pops.” I refrain from adding too many details, if any at all, into the whites, so the water area doesn’t get too dark, and the painting stays on course with the original design and value structure.”
DESIGN TIP FOR MOVING WATER
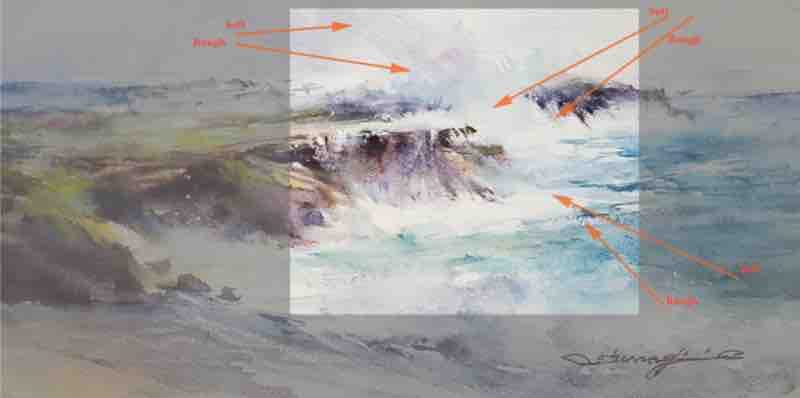
“For a more convincing illusion of water in motion, I design and paint the area using curved lines and zigzag shapes, more or less to resemble a “lying down S” shape. I keep the water shape white or very light in value during my entire plein air painting process. If the moving water is coming from or running into the distance, I use linear perspective to make all the curved lines and zigzag shapes converge into one vanishing point (see the illustration below).”
GET AN EDGE ON EDGES
“To avoid “stiffness” when painting a running creek, waterfall, or waves, I use a combination of soft and hard edges along the shapes of the water. To create the desired textures, I twist or drag my brush along the edges of shapes, or repeatedly change the speed and direction as I move my brush across the paper surface or the edges of the water shape. Before I finish a painting on location (or when I take it back to my studio), I often take a second look at the work for any over-painted long or hard edges along the moving water. I then use inexpensive bristle brushes to soften any hard edges, so the water shape blends with the background more naturally. This small step of edge justification helps to unify the composition and tie the entire painting together (see the illustration below).”


